
Canopy Tent Setup Guide: Quick Steps for First-Time Users
The first time putting up a canopy tent, most people expect it to be complicated. It isn't, really - once you've done it once, the whole thing takes only a few minutes. But that first attempt can feel confusing if nobody's walked you through it, especially with all the folding arms, sliders, and legs that don't seem to make sense until they're actually locked into place.
This guide walks through the setup process step by step, along with a few things that trip up beginners more often than they should.
Before Unfolding Anything
A little prep work up front saves a lot of headaches later. Look for a flat, open spot - and give it more clearance than you'd think you need, since the legs spread out wider than the footprint suggests once they're extended. Glance up too. Tree branches, power lines, anything overhead, because most frames end up standing well past eight feet once they're all the way up.
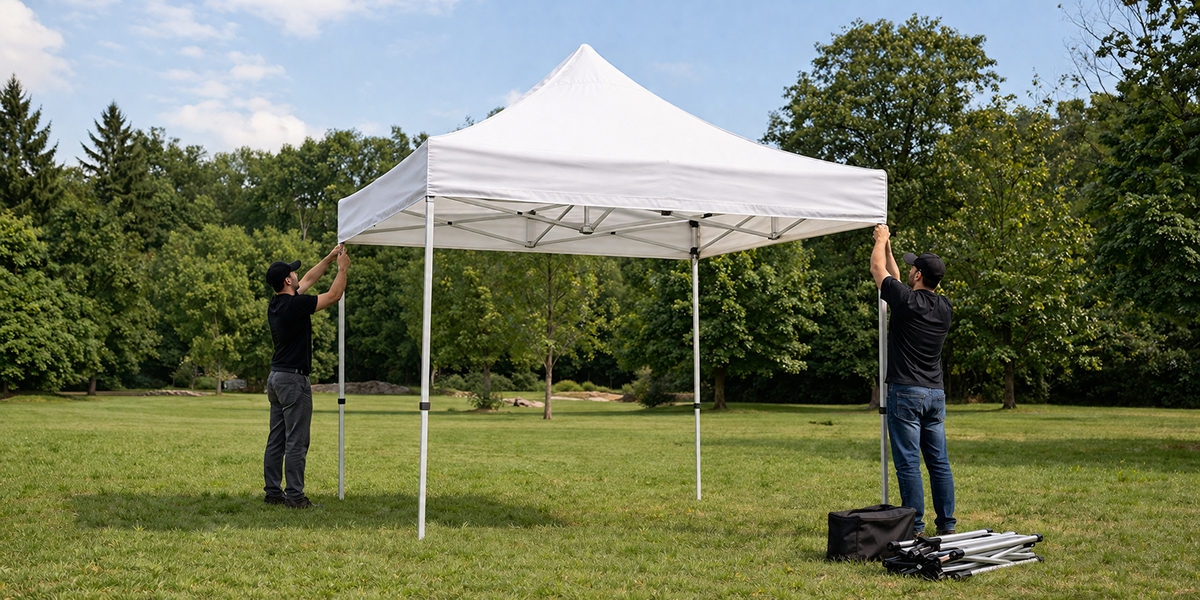
It helps to have a second person for the first setup, even though most canopy tents are technically a one-person job. Two sets of hands make it faster and reduce the chance of the frame twisting awkwardly halfway through.
Lay the folded canopy on the ground first and take a second to look at how the frame is built - where the hinges are, which direction the legs fold out, and where the roof fabric attaches. A quick look before starting prevents a lot of guesswork once the frame is standing.
Step 1: Unfold the Frame
Most canopy tents ship folded into a long, narrow shape. Start by carrying the frame to the setup location and opening it partially, standing it upright so the legs point downward. Spread the base outward evenly on all four sides - don't pull one side out fully before the others, since that puts uneven stress on the frame and can make it harder to square up later.
At this stage the frame will look something like an accordion, roughly half-open. That's normal. Don't force it further yet.
Step 2: Raise the Frame to Working Height
Most canopy tents have adjustable legs with two or three height settings, controlled by push-button pins or sliding locks near the base of each leg. Starting at the lowest setting makes this step easier, since the fabric and frame carry less tension while everything is still being positioned.
Push each leg down slightly and listen or feel for the pin locking into place. Skipping this - leaving a leg unlocked - is one of the most common mistakes, and it's usually what causes a tent to collapse or lean once weight or wind hits it.
Step 3: Attach or Unfold the Canopy Top
If the fabric top isn't already attached to the frame, this is the point to secure it, usually with velcro straps, clips, or a sleeve that slides over the frame's ribs. For tents that come with the canopy pre-attached, just make sure the fabric is unfolded and draped evenly before pushing the frame any higher.
A pop up canopy tent is built specifically so the frame and fabric move together during this stage, which is part of why this style has become the standard for markets, trade shows, and backyard events - there's no separate assembly step for the roof.
Step 4: Push the Frame to Full Height
With the fabric in place, push the center hub or pull the corner legs upward until the frame locks at full height. This usually takes a bit more force than the earlier steps, since the fabric adds resistance once it's stretched taut across the frame.
Go corner to corner instead of muscling one side all the way up first - it's tempting to just push the closest one up as far as it'll go, but that usually ends up warping the frame slightly, and then one leg ends up carrying more weight than it should.
Step 5: Square the Frame and Adjust the Legs
Take a step back once it's up. Something usually looks a little off the first time - a corner sitting lower than the rest, the whole thing tilting slightly to one side. Almost always it's just a leg locked at the wrong height, or one corner that never fully extended in the first place. Walk around, fix whatever needs fixing, and don't move on to staking it down until it actually looks straight.
Step 6: Anchor the Tent
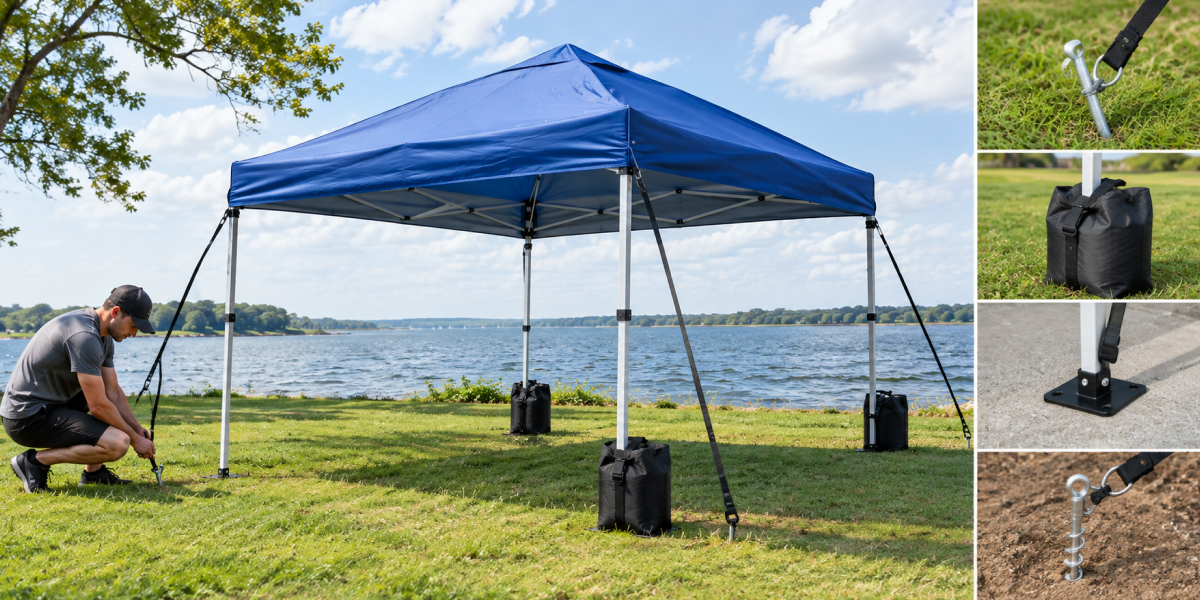
People skip this one constantly, which is a mistake, because it's arguably the step that matters most once you're actually outside. A canopy catches wind almost like a sail does - even a fairly mild breeze can tip an unanchored frame over, and it happens faster than most first-timers expect.
There are a few ways to handle it. Stakes work fine in grass or soil. On pavement or anywhere stakes won't go in, water-filled weights or sandbags do the job instead. Rope tie-downs help too, especially in open, exposed areas. A rough rule of thumb: figure on 25 to 40 pounds per leg once wind picks up, more if it's a larger tent. Most of the canopy damage people deal with later traces back to this exact step getting skipped.
Step 7: Add Sidewalls or Accessories (Optional)
If the setup includes sidewalls, half walls, or a valance, these typically attach after the frame is fully up and anchored, usually with velcro or hook attachments along the frame's edges. Adding sidewalls after anchoring - rather than before - makes it easier to keep the frame square while the walls go on.
Taking It Back Down
Breakdown is mostly the setup process in reverse, but a few habits make it go faster and protect the tent for next time:
- Remove sidewalls and accessories first, before collapsing the frame
- Lower the frame slowly rather than releasing all corners at once
- Fold the canopy fabric loosely rather than jamming it into a tight roll, which causes creases and wear over time
- Store the folded frame in its bag standing upright if possible, which reduces strain on the joints
A Few Things First-Timers Get Wrong
Forcing a stuck leg. If a leg won't lock, it's usually not aligned correctly rather than genuinely stuck. Lower it slightly and try again instead of pushing harder.
Setting up in high wind. A canopy tent, especially before it's anchored, can act like a sail and lift unexpectedly. Waiting for a calmer moment - or having help ready to hold it down - makes a real difference.
Skipping the instructions that came with the tent. Even though most canopy tents follow a similar general process, frame designs vary enough between brands that a quick glance at the included instructions can save time and prevent mistakes.
Not practicing before the actual event. Setting up a custom canopy tent for the first time at a trade show or market, under time pressure, is a rough way to learn. A practice run at home, even just once, makes the real setup far less stressful.
Why the Right Tent Makes This Easier
Setup speed and difficulty vary quite a bit between tent brands and quality levels. Cheaper frames often use thinner metal, looser pins, and fabric that doesn't stretch evenly, which makes every step in this guide harder than it needs to be. A well-built frame with tight tolerances tends to lock cleanly and stay square without much fighting.
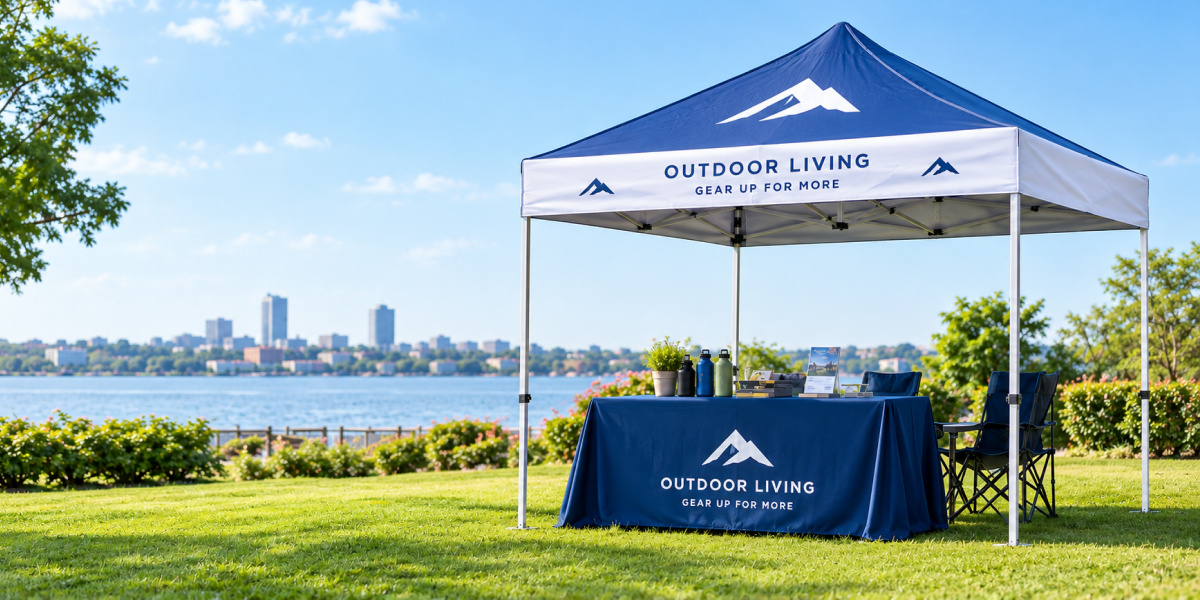
This matters even more for custom printed canopy tents used for branding purposes, where a lopsided or wrinkled setup undercuts the whole point of having a professional-looking booth in the first place. Investing in a solid frame pays off less in the first setup and more in the twentieth - worn pins and loose joints are what eventually make an older tent frustrating to work with.
Getting Comfortable With Canopy Tent Setup
None of this is actually hard once it clicks - it's just confusing the first time through, when nothing about the frame makes intuitive sense yet. Go corner by corner, don't skip staking it down, and if there's any way to do a dry run before the real event, do it. Most people who've been through it once say the same thing: after that first time, the whole setup takes maybe five or ten minutes. It's the not-knowing part that's actually hard, not the tent.